I like using recycled materials,
so here's a doll I made out of an
old pair of canvas pants.
I drew a simple pattern of a doll
on the cloth with a pencil.
on the cloth with a pencil.
After pinning two pieces of cloth together, I cut it out
leaving a bit of a seam.
Next, I sewed the two pieces of cloth together.
It is important to put notches on the seam so that
when you invert the doll,
the cloth won't bunch up.
I am now inverting the doll to the right side.
If it is difficult to invert, you can use a
long nosed pair of pliers.
Fill the doll with fiberfill or cotton.
When it comes to the arms,
just put fiberfill or cotton inside the hands,
then sew a knot to keep the cotton in there.
Sew a knot in between the arm and body too
to keep the cotton from migrating to the arm.
The arms will not have any cotton or fiberfill
so it is pliable.
When the body is filled with fiberfill or cotton,
place a stone at the bottom
to add weight.
Cut out two ovals from cardboard
to fit inside the base.
Use a glue gun to glue cloth to the base.
Then glue on the 2nd cardboard oval to cover it up.
Then glue on the 2nd cardboard oval to cover it up.
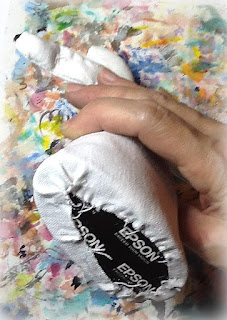
Paint the doll with gesso or wall putty
to make a base for paint.
Draw a face.
Or you can use movable eyes
and a button nose if you prefer.
Or feel free to use this template
with carbon paper to trace it
on to your doll.
Paint the face. I used acrylic paints.
I like using two or more shades of the same color
to add interesting splotches.
Also, this hides any imperfections!
For the hair, I used some scraggly yarn
I unravelled from an old sweater.
I looped the yarn around my fingers,
cut it, and arranged it on her head.
Then I used a glue gun to hold it in place.
The important thing is not to let any bald spots show!!
cut it, and arranged it on her head.
Then I used a glue gun to hold it in place.
The important thing is not to let any bald spots show!!
Next, I looked for some lace
and fixed it around her shoulders.
I cut up some small bits for her neckline
and her sleeves.
To put words on her dress,
you may write directly on the dress with
a permanent pen.
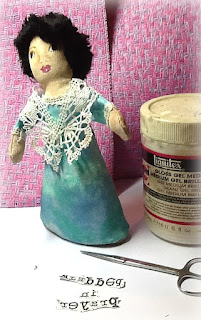
But I chose to use gel medium.
Make sure your words are inverted and
that you used a copy from a copier
not from a printer.
you may write directly on the dress with
a permanent pen.
But I chose to use gel medium.
Make sure your words are inverted and
that you used a copy from a copier
not from a printer.
Put gel medium on the side with the print.
Glue it on the dress.
Wait 30 minutes.
Glue it on the dress.
Wait 30 minutes.
To remove the paper, dip your finger
in water and rub off.
If some parts of the letters got removed,
like here with the letter e,
like here with the letter e,
just write over it with a permanent pen.
For the little book,
I cut out some leather from an old jacket.
I was so happy to find the leather label
of just the right size!
Make 3 signatures out of any kind of paper.
I used an awl to make the holes,
but you can use an ice pick or even a big needle.
Sew it up with the knot outside the signatures.
Use a glue gun to attach the signatures
to the leather cover.
to the leather cover.
Write prayers inside the little book.
Put velcro on the doll's hands
so that she can hold the Book of Prayers.
so that she can hold the Book of Prayers.
Paint a design on the hem of her skirt.
And here she is!
Holding on tight to my prayers!


No comments:
Post a Comment
I am so glad you dropped by! You are a blessing!
:^) Patsy